Why are nail tips so popular, you ask? Well, they offer a fabulous way to flaunt long, beautifully shaped nails without the long-term commitment of growing them out. Traditional extension nail tips, covered with either gel or acrylic, are the game changers in nail artistry, blending durability with a flawless natural look.
Whether you're prepping for a special occasion or just want to give your daily look a boost, mastering the art of applying and removing nail tips is essential. So, let’s dive into this ultimate guide, ensuring you get the best out of your nail game.
But Firstly, What Are Nail Tips?
Simply put, nail tips are the classic solution for anyone looking to extend the natural free edge of their nails without the intricate process of sculpting on a nail form.
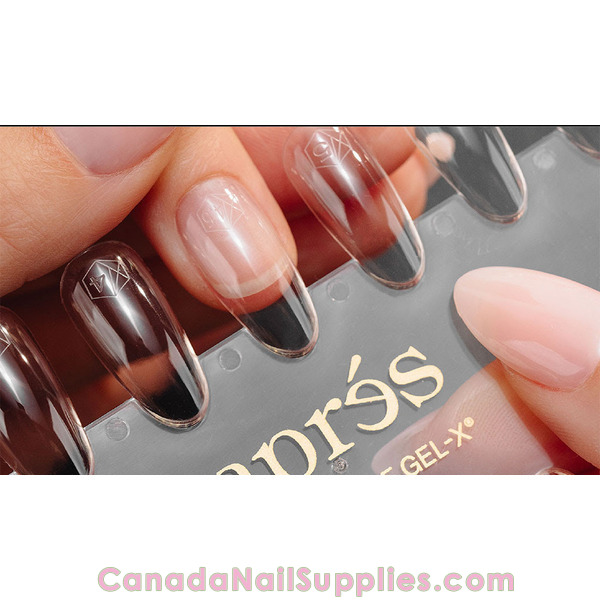
Nail tips are applied directly to the tip of the natural nail—usually covering about one-third to half of the nail bed—and come in various styles such as full well, half well, clear, natural, and white for that chic French look.
Once in place, these tips are skillfully blended to seamlessly integrate with your natural nails. The final touch involves covering them with a strengthening product like gel or acrylic, shaping them to your desired look. This method does a wonderful job of enhancing the length and beauty of your nails and also adds a layer of protection.
How to Apply Nail Tips
Applying nail tips is a transformative process that some even call therapeutic (we wholeheartedly agree with that). After all, there's no substitute for that deep inner satisfaction that you get with the enhanced appearance of your nails that scream "I'm lovin' it."
So, embarking on the journey of applying nail tips effectively requires a keen understanding of the process and precision (which usually comes with practice and more practice). Here, we'll guide you through each step meticulously, ensuring your nail tips are applied seamlessly and professionally.
Note: For more brand-specific application methods, please visit our 'How To’s' section for additional detail.
Step 1: Gather Up
Here’s a detailed list of what you’ll need:
Nail tips: These artificial extensions come in various sizes and shapes. Selecting the right size for each nail is crucial for a natural and comfortable fit.
Strong-hold nail glue: A high-quality nail glue ensures that your tips stay securely attached without lifting or shifting. We highly recommend opting for a glue that provides a strong bond but is gentle on natural nails.
A sturdy nail file: Used for shaping the edges of the nail tips to match the desired length and shape. A good nail file should be effective without being overly abrasive.
A gentle buffer: As the name implies, a nail buffer is used to buff the surface of the natural nail, creating an ideal texture for the glue to adhere to. It's an important tool because a buffed nail prevents air bubbles and ensures stronger adhesion.
Primer: It provides better adhesion between product and the natural nail.
Protective base coat:(If using a Builder Gel) Applying a base coat after tip application. Apply a protective base coat after tip application to help shield your natural nails and enhance the longevity of the nail tips.
Builder Gel or Acrylic : This strengthens the apex of the natural nail, providing necessary support for the nail tip extension. Builder gel or Acrylic is vital for maintaining the durability and integrity of the nail structure during wear.
Gel polish: Grab your favorite gel polish for some vibrant color. The better the quality, the longer your fabulous color will last without chipping.
Top coat: A top coat seals the gel polish, adding gloss and prolonging the durability of your manicure.
Cuticle pusher: An essential item, a cuticle pusher gently pushes back the cuticles to expose the full nail bed. It ensures that nail tips adhere properly and look neatly finished.
With the right tools at your disposal, you're well on your way to achieving beautiful, durable nail tips.
Step 2: Prepare Your Natural Nails
Getting the perfect application begins with priming your natural nails. No proper prep means no nail tip glory. This step ensures your nail tips stick like they mean it and hang around for the long haul.
Strip away old polish and oils with a remover: Use a non-acetone nail polish remover to clean off any old polish. This will also help to remove the natural oils from your nails, providing a clean surface for the adhesive.
Ease those cuticles back: Gently push back your cuticles using a cuticle pusher. This exposes more of the nail surface for better adherence of the nail tip. Be careful not to be too forceful, as this can damage the nail bed and lead to infections.
Buff up your nails: Using a gentle buffer, lightly buff the surface of each nail. This creates a slightly rough texture, enhancing the glue's ability to bond to the nail. Avoid over-buffing, which can weaken your nails.
Dry off completely: Before moving on to applying the nail tips, make sure your nails are completely dry. Give them a good clean using a nail cleaner like Swipe to get rid of any moisture or oils. It’s important since even a little moisture can prevent the glue from setting properly and reduce the longevity of your nail tips.
Step 3: Choosing the Right Size Nail Tip
Picking the right size nail tip is key. It’s like finding the perfect pair of high-heeled shoes; get the fit right, and you’re set for comfort and style.
Test different sizes against your nails to find your match: Place various sizes of nail tips over your natural nails to see which fits best. The right size should cover your nail from side to side without extending over the lateral edges.
Ensure the tip fits snugly across without spilling over the edges: A nail tip that is too wide can be uncomfortable and may lift at the edges, leading to premature falling off. It should align perfectly with your natural nail's shape.
Too big? File it down to size: If a nail tip is slightly larger, use a nail file to gently file it down until it fits perfectly. It’s better to choose a slightly larger size and file it down than to choose one that is too small, as a small tip can apply uneven pressure on the nail, leading to discomfort or damage.
Step 4: It's Application Time (Yay)
Proper application is everything. It’s what keeps your nail tips looking sharp and staying put, without any pesky lifting or cracking along the way.
Brush a thin glue layer inside the nail tip: Apply a small amount of nail glue inside the curvature of the nail tip. A thin layer is sufficient—over applying glue can lead to excess spilling out when pressed, which gets really messy.
Carefully align it with your natural nail's edge: Position the nail tip so that the bottom edge where the glue has been applied is just touching your natural nail's free edge. Alignment is crucial for a natural look and comfortable fit.
Watch out for pesky air bubbles: When you’re putting on the tip, start at a 45-degree angle and gently roll it onto your nail. Press down carefully to push out any pesky air bubbles. Keep an eye out for bubbles under the nail tip—they can mess up the glue job, so smooth them out right away if you spot any.
Press down firmly for about 10 seconds: Hold the nail tip in place to allow the glue to bond securely. Applying consistent, firm pressure ensures that the tip attaches evenly without any gaps.
Repeat for a full set: Follow these steps for each nail, ensuring consistency in application to achieve a uniform look across all nails.
Step 5: Blending and Shaping
Once the nail tips are securely attached, here's what you need to do next:
File down the edges to blend the tip with your natural nail: Use a fine-grit file to gently file down the junction between the nail tip and your natural nail. This helps to make the transition invisible, creating the illusion of natural length.
Clip to the Perfect Length: Time to trim those tips! Use a tip cutter or nail clippers—clip one side, then the other. To break off the excess, gently fold the tip up and down at the center, then give it a little twist to remove. Perfect length, just like that.
Step 6: Layer Up
Time to bring in the big guns—apply your favorite Acrylic or Gel over the natural nail and tip extension. This is where everything comes together, creating a strong and seamless bond that’ll last through whatever comes your way.
Step 7: File, Shape, Smooth
Choose your shape: Whether you prefer round, square, almond, or any other shape, use your nail file to shape the tips. This is where you can get creative and personalize your look.
Smooth out to prevent snags: After shaping, go over the nails one more time with a buffer to smooth out any sharp or rough edges. This step is important to prevent the nails from snagging on fabric and ensures a polished finish.
Finish Shaping the Nail and Free Edge: As you finesse the shape and free edge, make sure to leave some strength around the apex. This little trick helps protect the tip extension and keeps your nails looking sharp and durable..
Step 8: Finishing Touches
This is where you seal the deal. It’s all about armoring up your nails and giving them that pop of color and shine to really make them stand out.
- Pick a polish and go for two vibrant coats: Choose a gel polish color that suits your mood or outfit. Apply two coats, curing before applying the second layer. This ensures even coverage and a richer color.
- Seal it with a top coat for shine and endurance: Finish off with a top coat to seal in the color and give your nails a glossy, protective finish. The top coat also extends the life of your manicure by preventing chipping and wear.
How To Remove Nail Tips
Important Note: Suitable for removal of Acrylic and Soft Gel only. Please remember that hard Gel needs to be filed off.
Here’s a detailed guide on how to remove nail tips using acetone, which ensures a thorough removal process.
Step 1: Prepare to Soak
Start by assembling your nail tip removal kit:
Acetone: You’ll want to grab some high-quality acetone because it’s the champ at breaking down that stubborn glue holding your nail tips. Just a little goes a long way.
Cotton balls or pads: Stock up on these bad boys—they’re perfect for soaking up the acetone and getting it right where you need it.
Aluminum foil strips: These are your best friends for keeping everything in place. Wrap them around your fingers to hold the cotton pads snug and secure while the acetone does its magic.
Step 2: Soak Your Nails
Now, let's dissolve those nail tips:
- Drench cotton in acetone: Fully saturate the cotton balls or pads with acetone to ensure they can effectively dissolve the nail glue. Better solution? Get an acetone soaking bowl for effective removal.
Place on nails and wrap with foil: Position the soaked cotton on top of each nail tip and wrap securely with a strip of aluminum foil. This helps maintain contact with the nail and prevents the acetone from evaporating.
Chill for 15-20 minutes: Allow your nails to soak. The time will enable the acetone to penetrate and loosen the adhesive holding the nail tips.
Step 3: Remove the Tips
Gently remove the nail tips:
Peel off the foil and cotton gently: Slowly take off the foil and cotton. Most of your nail tips should just pop right off without a fuss.
Nudge the nail tip off with a wooden stick: If any bits are hanging on, gently push them off with a wooden stick. No rush—just easy does it.
Stubborn bits? Give them another soak: Got a clingy piece? No problem. Slap on another acetone-soaked cotton pad, chill a bit longer, and they’ll loosen up..
Step 4: Nail Care Post-Removal
Alright, now that the nail tips are easily removed, let’s focus on pampering your natural nails. Kick things off by washing your hands thoroughly to get rid of any stubborn acetone traces—trust us, acetone can be super drying. After that, go all in with a rich moisturizing lotion. Slather it on your nails and cuticles to bring back some much-needed hydration. This is super important because that acetone can strip away moisture like nobody’s business, and you want to make sure your nails stay strong and don't get brittle. Keep them looking healthy and ready for whatever nail adventure comes next.
Where to Buy Nail Tips in Store?
At Canada Nail Supplies we're thrilled to offer you a premier selection of top-quality nail tips and nail glue collection at the best rates on the market. We've got everything you need, from Young Nails half well, Ugly Duckling Premium Tips to edgy stiletto-shaped tips for those bold enough to stand out.
If you're in search of full cover tips, we have those too! For more details, please visit our 'How To' section.
Need the right tools? We've got sharp nail tip cutters and super-strong glues to keep everything in place.
Are you excited to discover your next nail obsession with us? Please feel free to contact us if you need any sort of assistance from our nail experts.